Pages

Tuesday, January 31, 2023

Make This Beautiful Valentine with Stampin' Up!s Country Floral Lane Suite

One of the benefits of being an Independent Stampin' Up! Demonstrator is being able to preorder products a month ahead before they are released to the public. Occasionally a product is so popular that it sells out quickly and Stampin' Up! has difficultly getting more from their suppliers in a timely manner. Well, that is the case with some of the products that made this card. 

When I designed this beauty at the end of 2022, there was plently of Country Floral Lane Suite products available, but today when I planned to share this card, none are available and won't be until mid April. Yes, this is a bummer for my customers and readers, but I have learned a lesson too. Share my designs sooner than later.

My hope is that you can use this layout as inspiration for a similar Valentine using products you already own. No matter what products you have to work with, your labor of love will be a welcome surprise to your recipient. People (friends and family) love getting surprises in person and in their mailbox. Even though postage has now risen to 63 cents for a 1 ounce letter, it still the cheapest way to send a gift telling someone you are thinking of them.


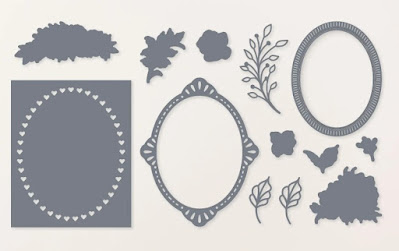
Country Floral Lane Bundle
Images (c) Stampin' Up!

Country Floral Lane Designer Series Paper
Images (c) Stampin' Up!

Cottage Gingham 6" x 6" Designer Series Paper
Images (c) Stampin' Up!

I have a tutorial about this card that is available for purchase. So if you happen to be one of the lucky ones who already purchased the Country Floral Lane Suite, then click on the link below. You'll get a shopping list of all products used, measurements and step by step assembly directions.


Learn how to get more done in less time by signing up for my exclusive "Insider" bi-monthly newsletter. Twice a month the news will share card class information, Stampin' Up! promotions, hot tips from me, and free tutorials! Subscribe to my Bi-Monthly Newsletter today. Plus you’ll receive a FREE 14 Card One Sheet Wonder Tutorial to download when you receive my thank you email for signing up.


Please contact me or email me at stampinwitheva@gmail.com if you have any questions about products, techniques, or card designs. Comments below are welcomed too!

Monday, January 30, 2023

Stampin' Up!s Country Floral Lane Suite Creates the Most Lovable Valentine Card Ever for Your Special Someone

Valentines is just a couple weeks away, so please help yourself to my original card layout as inspiration for what you have in your papercrafting stash. (The Stamp Set and Punch Bundle are currently sold out and Stampin' Up! is predicting it will receive more inventory by April 17, 2023. However, that doesn't really help you make Valentines right now, thus my suggestion to use what you already have in your stash.)

Your loved one will appreciate any beautiful handmade card you create when it is given with love. But if you do already own the Country Floral Lane Bundle and some of the Country Floral Lane Designer Series Paper then you will be ready to create this card that's full of love card very easily with my directions below.


Close Up of Hearts and Leaves arrangement.


Country Floral Lane Bundle
Images (c) Stampin' Up!

Country Floral Lane Designer Series Paper
Images (c) Stampin' Up!

Supplies and Cutting Dimensions

1. Petal Pink cardstock card base cut 5-1/2" x 8-1/2", scored at 4-1/4"

2. Sweet Sorbet cardstock layer cut 3-7/8" x 5-1/8" and adhere to card front.

3. Country Floral Lane Designer Series Paper (DSP) cut 3-3/4" x 5" and adhere to Sweet Sorbet Layer.

4. Basic White cardstock 2-3/4" x 4", die cut with the Scalloped Contours Dies using your die cutting machine.

5. Stamp the "With Love" in Sweet Sorbet ink first on the scalloped rectangle before adhereing the hearts and leaves as shown in the photo. Using Dimensionals you can adhere the Basic White scalloped rectangle to the card front.

6. Assorted Scraps of Basic White that will become the two large punched hearts, two small punched hearts and two leaves stamped with the Country Floral Lane stamp set in Petal Pink, Sweet Sorbet, and Mint Macaron ink pads using clear stamp blocks. Then use the Country Bouquet Punch and punch out the stamped images.

7. Arrange the punched images as shown in the photo using Glue Dots, Tombow Multipurpose Glue, and Mini Dimensionals. Add Basic Pearl Jewels for embellishment.

8. Inner card layer in Basic White cardstock cut 4" x 5-1/4", stamped with the Happy Valentines Day greeting in Sweet Sorbet ink. You can also add a couple hearts inside punched out using one of the coordinating pieces of the DSP.

9. Decorate your Basic White Medium Envelope flap with a piece of the matching DSP cut at 2-3/8" x 6", adhere to exterior of envelope flap and trim off excess with paper snips.

Other Tools You will Need:
Paper Trimmer
Take Your Pick Tool
Stampin' Seal adhesive

Have fun making this card your own. You could try a landscape positioned card too. Happy early Valentines Day!

***************

Learn how to get more done in less time by signing up for my exclusive "Insider" bi-monthly newsletter. Twice a month the news will share card class information, Stampin' Up! promotions, hot tips from me, and free tutorials! Subscribe to my Bi-Monthly Newsletter today. Plus you’ll receive a FREE 14 Card One Sheet Wonder Tutorial to download when you receive my thank you email for signing up.


Please contact me or email me at stampinwitheva@gmail.com if you have any questions about products, techniques, or card designs. Comments below are welcomed and appreciated too!

Friday, January 27, 2023

Try This Easy Sweet Baby Card Idea Using Stampin' Up!s Adorable Owl Stamp Set

 Babies are the cutest, aren't they? Several of my friends have adult daughters that are expecting. So I wanted to be prepared with an easy baby card when the delivery date arrives. This card design using Stampin' Up!s Adorable Owls stamp set goes together quickly and can be mass produced in most any color combination you might have in your crafting stash. I love how the owl stamped in matching ink looks so cute and you don't have to hand color it! Give it a try!

This card layout was inspired by Sassy Papercrafts.


Adorable Owls Stamp Set - available through 2/28/23
as a Sale-a-Bration reward with a $50 USD order before tax and shipping.

Images (c) Stampin' Up!

Country Floral Lane Designer Series Paper
Images (c) Stampin' Up!

Country Gingham 6" x 6" Designer Series Paper
Images (c) Stampin' Up!


Cutting  Dimensions and Supplies Needed

Petal Pink or Balmy Blue Cardbase 5-1/2" x 8-1/2" , scored at 4-1/4"
Country Floral Lane Designer Series Paper 2-5/8" x 4"
Country Gingham Designer Series Paper 2-5/8" x 4"
Petal Pink or Balmy Blue 3" square
Basic White 2-1/2" square
Inner Layer Basic White 4" x 5-1/4"
Exterior Envelope Flap use your choice of either of the Designer Series Papers shown here 2-3/8" x 6"

Stylish Shapes Dies - Largest and Next Largest Square
Sweet Sorbet or Balmy Blue Ink
Solid Faceted Gems in Balmy Blue or Petal Pink
Basic White Medium Envelopes
Stampin' Seal Adhesive
Dimensionals
Take Your Pick Tool
Paper Trimmer
Cut & Emboss Machine

This card design would also be very cute done as a Thank you card for after a baby shower. The Momma-to-be would love a bunch to send out.

************

Did you enjoy this post? Here are some more posts using the Adorable Owls stamp set to inspire you.


Learn how to get more done in less time by signing up for my exclusive "Insider" bi-monthly newsletter. Twice a month the news will share card class information, Stampin' Up! promotions, hot tips from me, and free tutorials! Subscribe to my Bi-Monthly Newsletter today. Plus you’ll receive a FREE 14 Card One Sheet Wonder Tutorial to download when you receive my thank you email for signing up.


Please contact me or email me at stampinwitheva@gmail.com if you have any questions about products, techniques, or card designs. Comments below are welcomed too!

Wednesday, January 25, 2023

Stampin' Up!s Adorable Owls Stamp Set Used for a Fun Boys Birthday Card - Give This One a Try!

Have you fallen in love with this stamp set yet? Yesterday, here on my blog I shared a girl version of this card design. Today is the boy's version. They are almost identical. I only changed the hat color and the greetings. You could make multiples of this card if you have a lot of young boys in your family.

If you decide you can't live without this set, place a $50 USD order with me before tax and shipping and you can get the Adorable Owls Stamp set FREE until February 28, 2023.


Adorable Owls Stamp Set
Images (c) Stampin' Up!


Dandy Designs Designer Series Paper
Images (c) Stampin' Up!


Prepared Shopping List for You

One retired product used in this card was the Stitched Shape Framelits Dies. I used the largest circle in the set for the Peek-a-Boo Window.

Cut & Assemble Directions:

1. Cut 4-1/4" x 11" piece of Thick Basic White, score at 5-1/2"

2. Cut 4" x 5-1/4" Dandy Designs Designer Series Paper.

3. Adhere only along the edges to the card base front.

4. With your die cutting machine and largest Stitch Shape Framelits Dies, open the card flat and die cut the circle in the front of the card using the photo as reference for placement.

5. Save the Basic White circle, the Dandy Designs circle can be saved for another project.

6. On a small piece of Basic White 3" square, stamp the owl in Memento Tuxedo Black Ink. Color owl with the assorted Stampin' Blends listed in the shopping list and refer to photo when coloring.

7. Fussy Cut out the owl with paper snips. Use the Stampin' Write Basic Black marker (brush end) from the back side to color the cut edges black. (Makes for a much nicer looking image.)

8. Fold the card closed and adhere the Basic White die cut circle into the window opening the die cut created. Add dimensionals to the owl and adhere to the circle. Stamp the "It's Your Day" greeting in Soft Suede ink inside the card as shown. Finish with adding the Rustic Metallic Adhesive Backed Dots.

9. With two other small pieces of Basic White (1-1/2" x 3") cardstock, stamp the happy birthday and grandson greetings from the A Grand Kid set in the Soft Suede ink. Then punch out with the Double Oval punch. 

10. Adhere the word ovals to the edge of the circle on the card front without accidentally sticking them to the owl circle inside.

11. Lastly, cut a 2-3/8" x 6" matching piece from the Dandy Designs paper and adhere to the exterior envelope flap. Trim off the excess.

Ta-Da! You finished! Thanks for stopping by, I hope you'll visit again soon!

Learn how to get more done in less time by signing up for my exclusive "Insider" bi-monthly newsletter. Twice a month the news will share card class information, Stampin' Up! promotions, hot tips from me, and free tutorials! Subscribe to my Bi-Monthly Newsletter today. Plus you’ll receive a FREE 14 Card One Sheet Wonder Tutorial to download when you receive my thank you email for signing up.


Please contact me or email me at stampinwitheva@gmail.com if you have any questions about products, techniques, or card designs. Comments below are welcomed and appreciated too!

Tuesday, January 24, 2023

Stampin' Up!s Adorable Owls Sale-a-Bration Stamp Set is Perfect for a LIttle Girl's Peekaboo Birthday Card

Sugar and Spice, and everything nice, that's what little girls are made of. 

Recently, one of my customers requested I design a birthday card for her 10 year old granddaughter. I knew immediately I was going to use the Adorable Owls stamp set that is currently available as a Sale-a-Bration selection. It can be yours with a $50 USD purchase prior to tax and shipping through the end of February. This darling card is what I came up with. A Peek-a-Boo stand up card. I think she will love it!


Inside Peek


Adorable Owls Stamp Set
Images (c) Stampin' Up!

Dandy Designs 12" x 12" Designer Series Paper
Images (c) Stampin' Up!


One retired product used in this card was the Stitched Shape Framelits Dies. I used the largest circle in the set for the Peek-a-Boo Window.

Cut & Assemble Directions:

1. Cut 4-1/4" x 11" piece of Thick Basic White, score at 5-1/2"

2. Cut 4" x 5-1/4" Dandy Designs Designer Series Paper.

3. Adhere only along the edges to the card base front.

4. With your die cutting machine and largest Stitch Shape Framelits Dies, open the card flat and die cut the circle in the front of the card using the photo as reference for placement.

5. Save the Basic White circle, the Dandy Designs circle can be saved for another project.

6. On a small piece of Basic White 3" square, stamp the owl in Memento Tuxedo Black Ink. Color owl with the assorted Stampin' Blends and refer to photo when coloring.

7. Fussy Cut out the owl with paper snips. Use the Stampin' Write Basic Black marker (brush end) from the back side to color the cut edges black. (Makes for a much nicer looking image.)

8. Fold the card closed and adhere the Basic White die cut circle into the window opening the die cut created. Add dimensionals to the owl and adhere to the circle. Stamp the "It's Your Day" greeting in Polished Pink ink inside the card as shown. Finish with adding the Opal embellishments.

9. With two other small pieces of Basic White (1" x 3") cardstock, stamp the cursive happy birthday words individually from the Biggest Wish stamp set in Polished Pink ink. Then carefully fussy cut out each word. 

10. Adhere the words to the edge of the circle on the card front without accidentally sticking them to the owl circle inside.

11. With another 1/2" x 2-1/2" piece of Basic White Cardstock stamp the granddaughter saying from the A Grand Kid stamp set in Polished Pink ink.

12. Lastly, cut a 2-3/8" x 6" matching piece from the Dandy Designs paper and adhere to the exterior envelope flap. Trim off the excess.

Ta-Da! You finished! Thanks for stopping by, I hope you'll visit again soon!

Learn how to get more done in less time by signing up for my exclusive "Insider" bi-monthly newsletter. Twice a month the news will share card class information, Stampin' Up! promotions, hot tips from me, and free tutorials! Subscribe to my Bi-Monthly Newsletter today. Plus you’ll receive a FREE 14 Card One Sheet Wonder Tutorial to download when you receive my thank you email for signing up.


Please contact me or email me at stampinwitheva@gmail.com if you have any questions about products, techniques, or card designs. Comments below are welcomed and appreciated too!

Monday, January 23, 2023

Stampin' Up!s Adorable Owls Stamp Set is Soaring In So You Can Share This Darling Card with a Friend or Loved One. Suitable for Any Occasion, Really!

Stampin' Up!s once a year Sale-a-Bration is well underway and goes through February 28, 2023. Did you know that you can select from nine free products when you make a purchase of $50 USD before shipping and tax. The cool part is multiples of $50 keep earning you MORE rewards! There are some beautiful stamp sets and Designer Series Papers to select from. 

The card I'm sharing today uses two of the Sale-a-Bration reward products - the Adorable Owls stamp set and the Dainty Designs 12" x 12" Designer Series Paper. It was so fun to create multiple cards in a variety of colors (you'll see them below) for a variety of occasions. Inside my variety of cards, I had "Congratulations" if it was a baby card, "Happy Birthday" for a special birthday, and a friend greeting just to cheer a friend up. There are so many possibilities with this set. There is also Graduation card possibilities if you start to let your creative juices flow!

My design was inspired from Jenny McCormac's card. 

Fresh Freesia Color

Make sure you always have a coordinating envelope to match your card, too!


A close up of how to color the Owl with Stampin' Blends Alcohol Markers.


Adorable Owls Stamp Set
Images (c) Stampin' Up!


Framed Florets
Images (c) Stampin' Up!

Dandy Designs Designer Series Paper
Images (c) Stampin' Up!

More Possible Color Ideas for You
Gorgeous Grape Layer

Highland Heather Layer

Petal Pink Layer


I hope you loved seeing multiple color combinations for this card design. It is always so fun to play with color!

Learn how to get more done in less time by signing up for my exclusive "Insider" bi-monthly newsletter. Twice a month the news will share card class information, Stampin' Up! promotions, hot tips from me, and free tutorials! Subscribe to my Bi-Monthly Newsletter today. Plus you’ll receive a FREE 14 Card One Sheet Wonder Tutorial to download when you receive my thank you email for signing up.


Please contact me or email me at stampinwitheva@gmail.com if you have any questions about products, techniques, or card designs. Comments below are welcomed too!

Sunday, January 22, 2023

Stampin' Up!s Love Cats Stamp Set is Head Over Heels for You to Make into This Darling Valentine Card for a Friend or Loved One

If you own a kitty cat, you know how playful they can be and the Love Cats stamp we are using  on the front of this design is no exception. This card is Black, White, and Sweet Sorbet colors, with minimal stamping, a little die cutting and total cuteness when it is finished. I recommend you give this one a try!


I always recommend to use a bit more of a coordinating designer paper to decorate you exterior envelope flap. It sure makes for a cute set!


Below is a fun way to surprise your recipient by stamping a partial laying down cat on the inner layer along with the "Head Over Heals about You" sentiment. They will be pleasantly surprised by your extra thoughtfulness.


SUPPLIES USED:
Love Cats Stamp Set, Country Floral Lane Designer Series Paper (DSP), Country Gingham DSP, Sweet Sorbet Cardstock, Stylish Shapes Dies, Basic White Cardstock, Memento Ink, Sweet Sorbet Stampin' Write Marker, Rhinestone Basic Jewel, Classic Matte Dots, and Medium Basic White Envelope.

I have prepared a shopping list for you and you can select the products you need from there and they will go straight into your shopping card at my online store. SHOP NOW

TOOLS NEEDED:
Cut & Emboss Machine, Take Your Pick Tool, Stampin Seal Adhesive, Dimensionals, Paper Snips, Clear Stampin' Blocks, and Simply Shammy

Images (c) Stampin' Up!

Country Floral Lane Designer Series Paper 12" x 12"
Images (c) Stampin' Up!


Country Gingham Designer Series Paper 6" x 6" paper stack
Images (c) Stampin' Up!

You definitely can whip up several of these cards in a few hours for all your Valentine card needs.

Silly me, I posted about this card for a blog hop earlier in the month, if you'd like to view that post, click here.


Learn how to get more done in less time by signing up for my exclusive "Insider" bi-monthly newsletter. Twice a month the news will share card class information, Stampin' Up! promotions, hot tips from me, and free tutorials! Subscribe to my Bi-Monthly Newsletter today. Plus you’ll receive a FREE 14 Card One Sheet Wonder Tutorial to download when you receive my thank you email for signing up.


Please contact me or email me at stampinwitheva@gmail.com if you have any questions about products, techniques, or card designs. Comments below are welcomed too!

Tuesday, January 17, 2023

1.17.23 Tuesday Tool Tip YouTube Video for You - Here's How to Get Perfect Looking Images!

 Here's another Tuesday Tip for you. It is a little shorter video than my first one. Give it a look!


In this short video, I show how to color the edge of a fussy cut stamped image using Stampin' Up!s Basic Black Stampin’ Write Marker. By using this product in your papercrafting projects you will achieve what looks like a perfectly stamped and fussy cut image (and no one will be the wiser, but you!) 

I hope you find this idea useful with your cardmaking and papercrafting projects.
Do you need more creative papercrafting ideas using Stampin' Up! products? I can help!

While visiting here, you can subscribe to my twice monthly Newsletter filled with class news, Stampin' Up! news, tips and some free card idea tutorials. As a thank you for subscribing you will receive a Free 14 card One Sheet Wonder Tutorial that can be used throughout the year. Subscribe here https://homemade-with-heart-stampin-with-eva.aweb.page/p/ed66a3c7-3266-49ae-a5b8-f165e4fc6d34
 
To purchase the Basic Black Stampin’ Write Marker  #100082  Cost $3 - Purchase several so you'll never be without one!

Thank you for watching!

Thursday, January 12, 2023

Sign Up for February's Paper Pumpkin Kit Called Sunshine and Smiles! It's So So Cute!!! Craft with Friends and Family!

 Hello to February's Paper Pumpkin Kit that you can order between now and February 10, 2023.

The February Paper Pumpkin kit is going to be a fantastic one. It will coordinate with the Rain or Shine Suite in the new Mini Catalog. There is an add-on of dies for the first time ever! Plus if you start or restart your subscription with a prepaid subscription you can earn Sale-a-Bration rewards too! Such value for your money!
In the attached photos you'll see the progression of how things will work together plus the benefits of the prepaid subscription. To order your prepaid subscription click on the link below


View the Rain or Shine Suite Collection on pages 50-51 of the Spring Mini Catalog (link below).


If you'd like to read more about Paper Pumpkin, visit this page here on my website.

I hope you'll consider signing up with me so we can enjoy Paper Pumpkin together in my private Facebook group too!

**********

Learn how to get more done in less time by signing up for my exclusive "Insider" bi-monthly newsletter. Twice a month the news will share card class information, Stampin' Up! promotions, hot tips from me, and free tutorials! Subscribe to my Bi-Monthly Newsletter today. Plus you’ll receive a FREE 14 Card One Sheet Wonder Tutorial to download when you receive my thank you email for signing up.


Please contact me or email me at stampinwitheva@gmail.com if you have any questions about products, techniques, or card designs. Comments below are welcomed too!

Saturday, January 7, 2023

Stampin' Up!s Birthday Card Organizer is Perfect to Help You Send Birthday Joy All Year Long to Your Family and Friends

GREAT NEWS - THE BIRTHDAY CARD ORGANIZER IS BACK IN STOCK IN MY ONLINE STORE!!!

I had so much fun with this kit! Here's Stampin' Up!s promotional information, then further on down we'll see how I customized my kit.

Get ready to party all year long with the Birthday Card Organizer Kit! This kit comes with everything you need to help you get organized and never miss out on a birthday celebration. It comes with the supplies to make 12 birthday cards with matching envelopes that you can easily customize. This kit is filled with precut floral and background pieces to really make your crafts unique. And don't forget the 8" x 10" (20.3 x 25.4 cm) yearly birthday organizer with sticker sentiments in multiple language options for perfect (and practical) personalization! You can keep track of all your loved one's birthdays, then make and save a card for them in the cardholder for each month. No matter who you are celebrating, you can give them something great!

Each kit comes with printed die-cut sentiments in Dutch, English, French, and German.

Kit includes:
* Designed projects
* Step-by-step instructions
* Precut pieces (No prep work! Get right to crafting)
* Makes 12 cards: 6 each of 2 designs
* Folded card size: 4-1/4" x 5-1/2" (10.8 x 14 cm)
* 12 printed envelopes
* Enough adhesive to complete projects
* One 8" x 10" (20.3 x 25.4 cm) yearly birthday planner

Product colors: Basic Black, Evening Evergreen, Petal Pink, Sahara Sand, and Soft Succulent

Kits by Stampin’ Up! are perfect for new crafters, busy crafters, or crafters who want quick and easy projects. All-inclusive project kits have everything you need in one box! Give as a gift or try them yourself. Kits are while supplies last. Order yours today here then click on the Shop Now tab. 


In the photo below you can see I added more color to the cover with Stampin' Blends markers. I used Pale Papaya. I also added assorted pieces of ribbon on the spiral binding for more special pizzazz.


Below are the cards I created from the kit supplies, plus adding some other stamp sets, cardstock and ribbon. There were multiples of each card, I only photographed them once.


I had already fussy cut out some of the florals from the Hues of Happiness Designer Series Paper, so the cards below came together easily. A fun pop of color to brighten someones day!

I hope you'll give this kit a try! Purchase Here

***********

Learn how to get more done in less time by signing up for my exclusive "Insider" bi-monthly newsletter. Twice a month the news will share card class information, Stampin' Up! promotions, hot tips from me, and free tutorials! Subscribe to my Bi-Monthly Newsletter today. Plus you’ll receive a FREE 14 Card One Sheet Wonder Tutorial to download when you receive my thank you email for signing up.


Please contact me or email me at stampinwitheva@gmail.com if you have any questions about products, techniques, or card designs. Comments below are welcomed too!

Friday, January 6, 2023

Easy Love Cats Valentine

 Here's another fun Valentine made with another one of the cute cats in the new Love Cats stamp set from the new 2023 Spring Mini catalog.


Use the 2022-24 In Color Sweet Sorbet cardstock and Designer Series Paper as the main focal color.


This card is easy to make, you'll just need to stamp the cat separately and fussy cut him out. The cat is layered on last after you stamp the greeting. For a fun touch make a speech bubble of the three hearts after having colored one in.


It is always fun to add a little pizzazz on the inside of your handmade cards too. Don't forget to finish your work of art with a decorated envelope flap. Makes for a beautiful set.


SUPPLIES USED:

Valentine Card using the following - Love Cats Stamp Set, Country Gingham DSP, Sweet Sorbet Cardstock, Basic White Cardstock, Memento Ink, Sweet Sorbet Stampin' Write Marker, 2022-24 In Color Baker's Twine, Classic Matte Dots, and Medium Basic White Envelope.

These items can be ordered at evadietz.stampinup.net, click Shop Now.

Have fun with these cute kitties. I love how playful they are.
********

Learn how to get more done in less time by signing up for my exclusive "Insider" bi-monthly newsletter. Twice a month the news will share card class information, Stampin' Up! promotions, hot tips from me, and free tutorials! Subscribe to my Bi-Monthly Newsletter today. Plus you’ll receive a FREE 14 Card One Sheet Wonder Tutorial to download when you receive my thank you email for signing up.


Please contact me or email me at stampinwitheva@gmail.com if you have any questions about products, techniques, or card designs. Comments below are welcomed too!